Do you have countless unused digital photos sitting on your computer or backed up on hard drives and cloud storage? We take so many photos these days, thanks to phone cameras and digital photography, yet often these photos never see the light of day after being snapped. Instead of letting those quality images disappear into the abyss of your devices, consider utilizing them to create stunning, custom wall murals for your home. Transforming your photos into wall décor is an easy and affordable way to decorate while adding a personal touch.
A photo mural can turn a blank wall into the captivating focal point of any room for year-round decor. And by using your own images, you can create wall art that showcases meaningful moments, your favorite locations and special memories. The entire wall becomes a canvas to arrange and display your best images.
Choosing your best photos
The first step in creating your custom photo wall mural is selecting the images you want to use. You likely have hundreds, if not thousands, of digital photos to pick from. It can be daunting to go through them all but consider it an enjoyable stroll down memory lane, and remember that in doing so, you have the opportunity to declutter and streamline your décor from multiple frames to a single mural.
As you review options, look for photos that have good image quality and higher resolutions if possible. Blurry, pixelated shots won’t translate well when enlarged into wall art. Landscape orientation also works better than portrait in most spaces.
Consider the room where you’ll display the mural and select photos that suit the purpose. For main living spaces, choose your top images from family events, vacations, or everyday moments that depict the people and things most special to you.
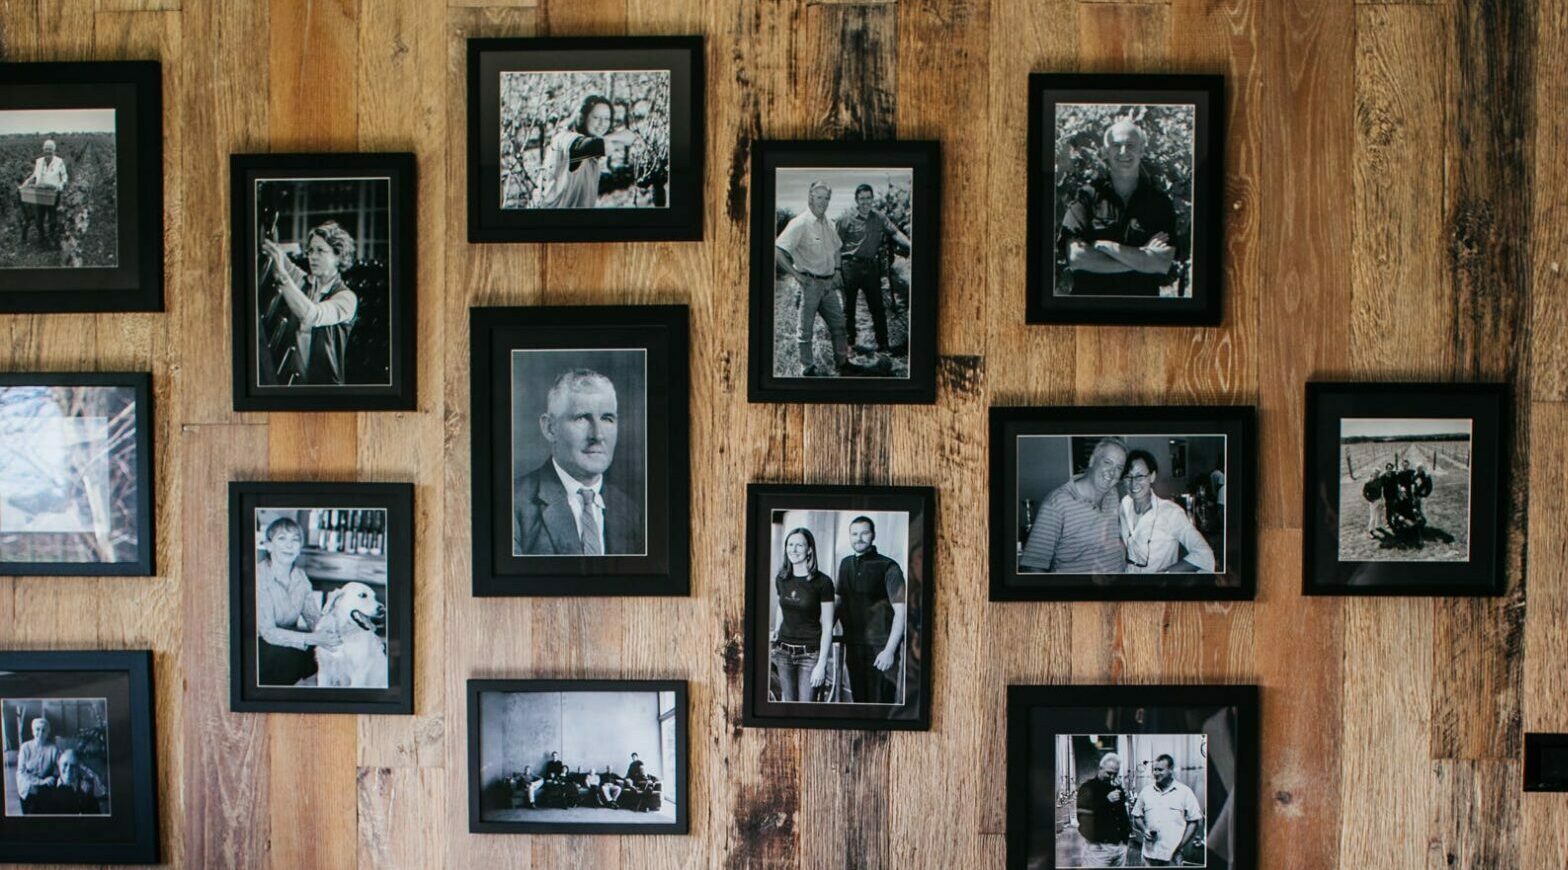
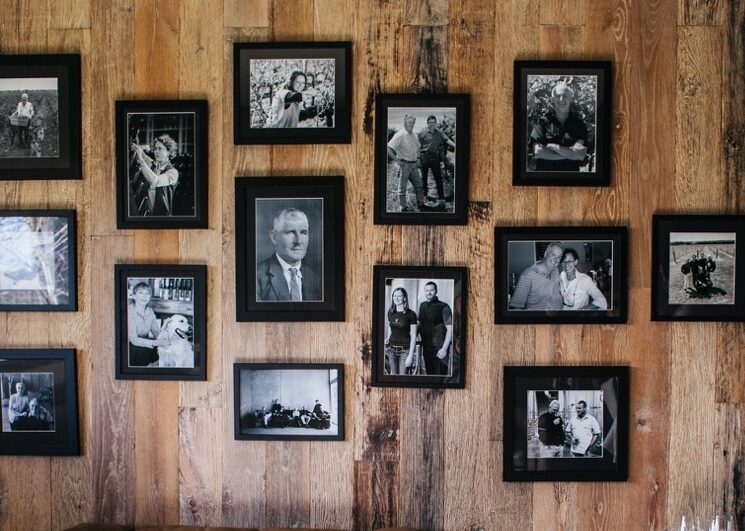
You’ll also want variety and contrast among your photos’ look and feel. Mix different subjects, textures, colors, lighting and arrangements for visual interest. Or maybe you want to choose a cohesive theme – choosing just black and white imagery, for example, can be incredibly impactful.
Editing photos for the perfect result
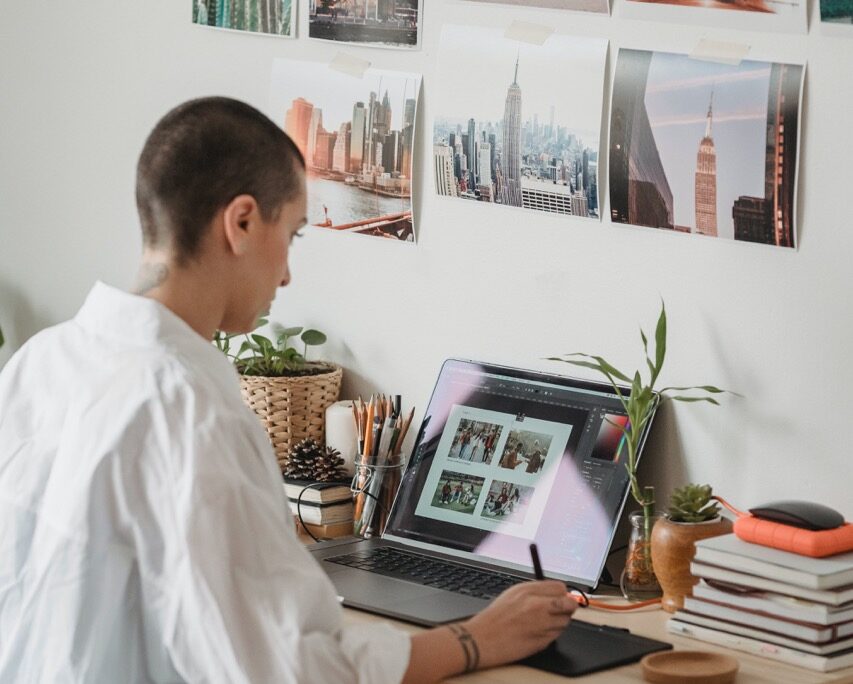
Once you’ve gathered your best photo candidates, it’s time to digitally edit and optimize them for printing. Using either basic image software on your computer or photo editing apps, you can crop pictures, adjust color and lighting, remove imperfections, and prep the files for your mural.
Start by cropping out unneeded backgrounds and sharpening the focus on main subjects. Crop proportionally to envision how images will cluster on your wall canvas. Enlarge key subjects when reasonable as well. Next, color correct varying light exposures and directions to improve consistency across images, unless diversity adds character. Boost contrast moderately for enhanced depth and clarity if required. You want to normalize the look and feel of all images to unite visually.
Remove any temporary objects, blemishes, dust spots, and distracting foregrounds as needed. Subtly enhancing sharpness and vibrance is also fine. Just don’t overly filter or perfect images – some flaws add authenticity and character!
Finally, resize each photo’s dimensions based on mapping plans for your wall space. Allow for plenty of wrap-around breathing room between images rather than cramming edge to edge. Scale photos proportionally together for balanced styling. Save your edited photos at the highest resolution possible.
Printing murals to transform your walls
Once your edited digital files are ready, it’s time to select a printing service and options to create your wall mural. Advancements in large format printing technology now enable high quality image replication on durable materials with adhesive backings designed specifically for wall application.
Consider material choices – a thick, semi-rigid polyester panel with fabric texture looks most like actual photos or artwork, but adhesive options vary too. Some are repositionable while others permanently affix. Always opt for the highest resolution renderings possible, even if they’re more expensive. This avoids a pixelated, blurry mural. Printing on matte or satin finishes reduces glare compared to gloss.
You’ll receive your wall mural in a tube or flat panels that can be assembled using included guides and numbered stickers on the back. Larger murals may come in sections requiring careful alignment during installation. Paneling offers more flexibility if walls have obstructions.

Installing creative wallpaper murals for your property
You’ve planned the layout, edited images, and ordered printing of your custom photo mural. The final step is properly installing it on your wall for an eye-catching accent. With the right preparation and techniques, you can handle this yourself without special skills.
Start by clearing the entire wall surface, remove hanging art, protruding nails, hooks or electric outlets that interfere. Clean the area thoroughly and fill and sand any cracks or holes for a smooth surface so the mural panels sit flush. Peel off each panel’s backing gradually while aligning and attaching from top down, smoothing gently side-to-side while taking care not to trap bubbles. Always start with upper left panels first – repositionable types allow tugging fabric off and re-sticking if required during the process.
For larger wall mural sections, tape panels together using painter’s tape before peeling adhesive backing or pasting if you’re installing a wallpaper mural. Align images according to the numbering system and layout template before permanently setting. This helps merge seams between repeats. Use a soft felt smoother across the entire surface to fully adhere fabric into the contours of the wall underneath. Press firmly on all areas, corners and edges – solid contact ensures long lasting wallpaper-like grip over time.
Stand back and enjoy your custom, DIY modern art photo collage consuming the entire wall with your favorite snapshots! Adding backlighting truly makes images pop off the surface into the room.
By following this guide’s key steps, you can display a stylish, oversized collage showcasing precious memories or colorful images that reflect nature that brighten up your home. The process allows you to rediscover and repurpose all those forgotten photos accumulating on your devices into a stunning art installation, and moving one mural is less hassle than multiple boxes of printed photos. Need help moving? Clutter is your one-stop solution to a stress-free move, so why not get in touch today.
Related Articles

![]()
Clutter is more than just storage.
To find out how you can declutter in your life, talk to one of our space experts. We’ll get you started with the right storage plan for you.